Good sound, great living - my Home Theatre den and home - part II
What I need from contractor:
Living / HT area
Feature wall project
- 100mm thick feature wall (glossy white to mount tv) large enough to wall mount 65" flatscreen (Panasonic / Samsung), width 1800mm
- holes in the wall to mount TV to the wall –
- TV will be 60kg
- side shelving with total depth of 250mm thick, width of 700mm, with shelves of 150mm (can fit DVD - typical DVD is 135mm deep),
- side shelving with total depth of 250mm thick, width of 700mm, with shelves of 150mm (can fit DVD - typical DVD is 135mm deep),
- Indents for grip handles
- Folding doors for side cabinets, and hydraulic uplifting doors for the top
- Cabinet goes down to 1000mm, then strips stop and it is a solid walnut color with a half folding door on the LEFT, and just the back panel of 50mm thick on the RIGHT - right side shelving elevated 1m off the ground to allow SVS PB 12+ subwoofer to fit underneath, with 100mm thick wall behind
- Back of cabinet – 55mm thick
- Soundproofing of feature wall with rock wool 80kg type
console
- of 1660mm width, depth 600mm, height 450mm from the ground with two layers of shelfs - mahogany
- Three sections, central 500 mm wide each, lower section with 280mm height for placing amp / BR player / others
- upper section for discs, 150mm height
- top panel has a hinge at the back measuring 10cm, which allows access to the rear of the console, and the shelves do not reach all the way back, allowing you to reach into the console, and get to the back of the amplifiers and other devices.
- I have also installed a light there, with a mirror on the feature wall, so this allows me to see what I am inserting better
- You can also keep a diagram of the back of the equipment handy for such work
Console – Custom made Mahogany shop Lifestyle 2010
Just a few words about this shop – Sani the chap at Lifestyle 2010 was very accommodating, and I found that he could make me a solid mahogany console for less than the cost of a custom made plywood one from my contractor, so he got the job. You will need to give him plans and specific details on the construction, but its worth the trouble.
As for the design, I specific slats for the doors, and I then realized, I created a console which looks a lot like the Air Division Telefunken "Line" console without trying to copy them!
Cable management:
This is very important if you wish to prevent back aches and also have smooth access to the equipment. That is why I opened up the back of the console as mentioned in the design of the console. Too often, you get a really nice console, that looks great, but has no access and it's a struggle to do a simple thing like plug in a new HDMI cable.
Height of the centre of the flatscreen off the ground: 1100mm
- mount rear speaker brackets – IKEA shelves - just behind sofa area at the 3.2m mark
- Acoustic treatment of the wall:
Firstly, the Swiss wood needs to sit on the frame / scaffold directly, with the rockwool behind it, and no plywood board.
The only area with it, is behind the area which we will mount the TV. This will be a strong point which allows the TV and future even bigger TVs to be mount.
The only area with it, is behind the area which we will mount the TV. This will be a strong point which allows the TV and future even bigger TVs to be mount.
We recess the plywood so that it is flush with the rest of the frame, and in the centre, 2048 by 2048mm, we can still have a complete strip of Swiss Wood. Thus the entire form is wholly made of Swiss Wood. The area around the plywood is still empty for rockwool, but the plywood will then not interfere with the whole length and we can avoid cutting the wood. Later on, the TV can be mounted through the Swiss Wood onto the plywood.
Then we cut a port for the cables to emerge out of the wood.
Then we cut a port for the cables to emerge out of the wood.
Furthermore, there must be enough struts to allow the thin (2048 by 128mm) panels of the Swiss wood to be applied onto the struts/frame and it will take the weight of the 100kg TV..
In between there should be rockwool tightly packed. And in the wrap round area, and the bay window bench, even the part that is on the side wall under the bay window needs the rockwool as that area will also resonate. The number of attachment points of the wood to the wall should be more than the current points.
Silicon is very effective as a sealant, for joints, and also for those areas, where the frame contacts the wall. The frame itself will need more points where it is nailed/screwed/ or simply more firmly attached to the wall.
So in summary:
- Swiss wood directly onto frame
- strong wood / plywood directly behind TV for the mount to be fixed onto it
- frame needs to be stronger, and less vibration prone - same goes for the ceiling too
- more struts for attachment of the Swiss wood
- frame needs to be securely attached to the wall - more than now
- use of silicon for joints
COVE LIGHT PROJECT
- L Bar- 125mm down from ceiling, MDF thickness 75mm, sticking out 400mm from the wall, except at the front feature wall (500mm) - that also gives me room for a hidden motorised screen in future
- Power socket at the top for screen
- L bar also to hide cabling for Home theatre cables
LIGHTING:
- down lights - use warm lights - energy saving bulbs / LED
- cove lights - T5 for ease of changing them - no dimmer needed – warm white lights – electronic ballast for all lights.
Electronic ballasts are important, as you don't want that buzzing sound when you turn on the lights from the speakers.
- switches - get different switches for dining area down lights vs living area;
SWITCHES/LIGHTS
Considering Legrand Mallia– firm click feel type
Switch for the cove lights – single switch with relay function – using existing living room switch
Separate ones for down lights for dining and living areas
Additional cove light – dim light
New switch for the fan
Switch for LED lights in feature wall
Switch for the down light in the console – to be mounted on the wall itself next to the lights
Switch for the low cinema lights running along the bottom of the bay window
Forming two nests of three gang switches
- for hallway entrance to living area - continue cove light box, and there will be two down lights
- covered trunking for dedicated power line to run from main DB area to the feature wall –
- add additional 1 distribution box (DB) for dedicated power line with separate distribution box (DB)
(I found out my new place has a 63A DB)
With four 20A lines:
- amp
- power amp
- subwoofers
- others including the CD player and BR player
Each one will be going from the new DB to a two gang MK gold plated wall socket:
With four 20A lines:
- amp
- power amp
- subwoofers
- others including the CD player and BR player
Each one will be going from the new DB to a two gang MK gold plated wall socket:
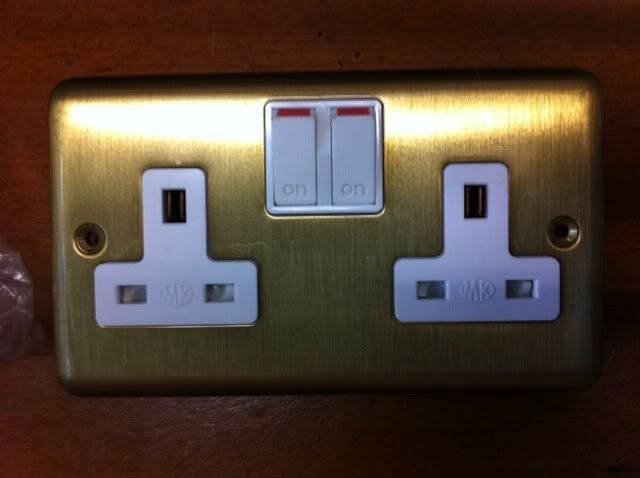
- add 12 sockets :
3 nests of 2 sited directly behind each shelf of the console
6 in the cabinet on the left bottom
Convert the single socket on the wall to a double
- run phone line from main DB via false ceiling to feature wall, joining the internal power trunking and down to the console for the Hi Fi
empty trunking in the ceiling for future hdmi / projector on the left side
- At the bay window, we will create a step or not let the fold down aspect of the bay window reach the floor, so that we can use the space to fix a weak LED light that will run from the feature wall to the end of the bay window, at the bottom very close to the floor to create a cinema foot light effect.
- Switches for lights to be install at the side of feature wall (big switches!)
12 downlights in the main hall:
4 on each side, 2 at the front and back
Separate dim "cinema mode" cove light in addition to regular cove lights
2 down lights at the entrance
Master Bedroom
- fan / ceiling light - Crestar
- Grohe shower set for the master shower – just change the current head to a rainforest shower head (fixed) and a handle – movable
Painting the wall opposite the door with ICI Dulux ("Luxury" – a kind of burgundy color)
Bay windows
Wood laminate on 2nd bedroom and study room. 25mm thick.
For bay window at living area & Master bedroom – to create backrest so someone sitting can rest on whilst watching TV
Bay window at living area:

To extend the laminate down to the floor level, to allow the window to function as a sofa seat,
AND
For the concealment of the wiring from the phone line socket to the feature wall.
Bomb shelter
- steel open shelves for the bomb shelter and a whole bunch of hooks for my bags/shoes/hiking gear - need ideas on where to get these (like those strong ones in the supermarkets is fine) – there is an online shop – Sgshelving (http://www.sgshelving.com/gallery.html)

Study
- study table (ended up with an Ikea) – consisting of long table (room length – 2.1m) plus wall mounted cabinets and uplights at the top of the back of the cabinets to give diffuse light and two down lights under the cabinets – switch controlled by a switch connected to a wall plug in the room
Entrance hallway
- False ceiling plus two down lights
- Mirror (brown)
- shelf for keys
Dining area rear wall bookshelf project
- Dining wall bookshelves – Billy brown color, up to 2.4m high, 2m wide, with gap to the top


Comments
Post a Comment